이전 포스팅 중 Swagger를 이용한 API 문서화 및 테스트 자동화 (https://kimyhcj.tistory.com/354) 내용이 있다.
사실 Swagger는 테스트 용이성이 매우 높고 쉽고 빠르게 초기에 진입할 수 있기 때문에 선택했었다.
Swagger를 사용해서 API를 모두 만들고 난 후 API에 대해서 FrontEnd 개발자와 이야기해야 할 때
문서가 필요했는데 Swagger 화면으로 설명하기에는 부족함이 많았다.
Swagger의 Annotation 설명과 실제 구현코드가 맞지 않을 수 있다는 것.
즉, 문서화 로직이 불일치 할 수 있다는 것이 가장 큰 문제였다.
그리고 소스코드에 더덕더덕 붙어 있는 지저분한 Swagger Annotation들...
@ApiOperation(value = "Get user by Id and password")
@ApiResponses({
  @ApiResponse(code = 200, message = "success"),
  @ApiResponse(code = 404, message = "can not find user with id") })
@GetMapping("id/{id}/pw/{pw}")
public ResponseEntity<User> getUserNoByIdAndPw(
  @ApiParam(value = "user id", required = true)
  @PathVariable(name = "id", required = true) @NotBlank String id,
  @ApiParam(value = "encrypted password", required = true)
  @PathVariable(name = "pw", required = true) @NotBlank String encPw ) {
    // 생략
    return new ResponseEntity<User>(user, user == null ? HttpStatus.NOT_FOUND : HttpStatus.OK);
}
그래서 API 테스트 보다는 문서화에 더 중점을 두고 테스트와 동시에 문서화가 이루어지는..
다시말해 테스트가 되어야만 문서화가 이루어지는 Spring Rest Docs 로 전환했다.
사실 Swagger의 가장 큰 장점인 API Test 를 쉽게할 수 있는...것은 Postman으로 충분했다.
전환한지 오래 되었지만 정리 차원에서 포스팅을 남겨 본다.
1. pom.xml 에 restdocs dependency 추가
<!-- spring rest docs -->
<dependency>
  <groupId>org.springframework.restdocs</groupId>
  <artifactId>spring-restdocs-mockmvc</artifactId>
  <scope>test</scope>
</dependency>
2. plugin에 asciidoc (파일을 컴버팅하고 target에 복사) 등 추가
spring-restdocs-asciidoctor 의존성은 snippets 을 자동으로 구성해 준다.
outputDirectory는 문서가 생성되는 디렉토리 경로이다.
<plugin>
  <groupId>org.asciidoctor</groupId>
  <artifactId>asciidoctor-maven-plugin</artifactId>
  <version>1.5.3</version>
  <executions>
  <execution>
  <id>generate-docs</id>
  <phase>prepare-package</phase>
  <goals>
    <goal>process-asciidoc</goal>
  </goals>
  <configuration>
  <backend>html</backend>
  <doctype>book</doctype>
  </configuration>
  </execution>
  </executions>
  <dependencies>
  <dependency>
  <groupId>org.springframework.restdocs</groupId>
  <artifactId>spring-restdocs-asciidoctor</artifactId>
  <version>2.0.2.RELEASE</version>
  </dependency>
  </dependencies>
</plugin>
<plugin>
  <artifactId>maven-resources-plugin</artifactId>
  <executions>
  <execution>
  <id>copy-resources</id>
  <phase>prepare-package</phase>
  <goals>
  <goal>copy-resources</goal>
  </goals>
  <configuration>
  <outputDirectory>
  ${project.build.outputDirectory}/static/docs
  </outputDirectory>
  <resources>
  <resource>
  <directory>
  ${project.build.directory}/generated-docs
  </directory>
  </resource>
  </resources>
  </configuration>
  </execution>
  </executions>
</plugin>
3. Test Code 작성
Junit 으로 Test 하며 MockMvc를 이용한다.
@Before 를 통해 Test 시 먼저 정의되어야 할 내용들을 set 한다.
private static final MediaType APPLICATION_JSON_UTF8 = new MediaType(MediaType.APPLICATION_JSON.getType(), MediaType.APPLICATION_JSON.getSubtype(), StandardCharsets.UTF_8);

@Rule
public JUnitRestDocumentation restDocumentation = new JUnitRestDocumentation();

@Autowired
private WebApplicationContext context;

private MockMvc mockMvc;

private RestDocumentationResultHandler document;

@Before
public void setup() throws ServletException {

this.document = document("{class-name}/{method-name}",
                 preprocessRequest(prettyPrint()),
                 preprocessResponse(prettyPrint()));
DelegatingFilterProxy delegateProxyFilter = new DelegatingFilterProxy();
delegateProxyFilter.init(new MockFilterConfig(context.getServletContext(), BeanIds.SPRING_SECURITY_FILTER_CHAIN));
this.mockMvc = MockMvcBuilders.webAppContextSetup(this.context)
              .apply(documentationConfiguration(this.restDocumentation))
              .addFilter(delegateProxyFilter)
              .alwaysDo(document)
              .build();
}
ㅇRestDocumentationResultHandler 를 {class-name}/{method-name} 로 설정하면
해당 테스트 클래스의 이름과 메서드 이름 기반으로 디렉토리 경로가 설정되어 snippets을 생성한다.
즉 DocConrollerTest.java 의 getDoc() 를 @Test 하면
target/generated-snippets/doc-controller-test/get-doc에 snippets리 생성된다.
prettyPrint()를 이용하여 문서가 예쁘게 만들어지게 할 수 있다. (json response를 json formatting)
alwyasDo()를 이용하여 모든 mockMvc 테스트에 대한 snippets 리 생성되도록 한다.
JWT를 Filter로 하여 Spring Security에서 사용자에 대한 인증을 체크하고 있기 때문에
MockMvc를 사용한 테스트에서도 해당 Filter가 적용될 수 있도록 DelegatingFilterProxy 를 생성하여 설정해 준다.
4. Test
API를 Test 하는 코드를 작성해 보자.
@Test
public void getDoc() throws Exception {
  mockMvc.perform(RestDocumentationRequestBuilders.get("/api/v1/doc/{docNo}", 1)
    .header(HttpHeaders.AUTHORIZATION, JWT_YHKIM)
    .accept(MediaType.APPLICATION_JSON))
    .andDo(print())
    .andExpect(status().isOk())
    .andDo(
      document.document(
        pathParameters(
          parameterWithName("docNo").description("문서 번호").attributes(Attributes.key("type").value("Number"))
        ),
        getResponseOne()
      ));
}
간단한 문서조회 Test 코드이다.
Rest API URL Path 에 속한 내용은
pathParameters, requestParameters, responseFields를 이용하여 문서를 작성하고 테스트를 완벽히 하자.
pathParameter 사용 예제
.andDo(
  document.document(
   pathParameters(parameterWithName("docNo").description("문서 번호").attributes(Attributes.key("type").value("Number"))))
 );
requestParameters 사용 예제
.andDo(
  document.document(
    pathParameters(parameterWithName("docNo").description("문서 번호").attributes(Attributes.key("type").value("Number"))),
    requestParameters(parameterWithName("opinion").description("의견").attributes(Attributes.key("type").value("String")).optional())
  )
);
responseFields 사용 예제
responseFields(
  fieldWithPath("result").type(JsonFieldType.BOOLEAN).description("성공 여부"),
  fieldWithPath("data").type(JsonFieldType.OBJECT).description("data"),
  fieldWithPath("data.contents").type(JsonFieldType.ARRAY).description("문서 정보").optional(), fieldWithPath("data.contents.[].no").type(JsonFieldType.NUMBER).description("문서 번호"),
  fieldWithPath("data.contents.[].requester.name").type(JsonFieldType.STRING).description("신청인 이름").optional()
);
optional() 을 통해 필수여부를 설정할 수 있다. (아래 6번 문서의 커스텀 참고)
Test 를 해 보면 doc-controller-test / get-doc 밑에 .adoc 파일들이 생성된다.
mockMvc building 할 때 markdown 으로 설정하면 .adoc 가 아닌 .md 파일로 만들수도 있다.
this.mockMvc = MockMvcBuilders.webAppContextSetup(this.context)
                .apply(documentationConfiguration(this.restDocumentation)
                .snippets().withTemplateFormat(TemplateFormats.markdown())) // <--- .md
                .alwaysDo(document)
                .build();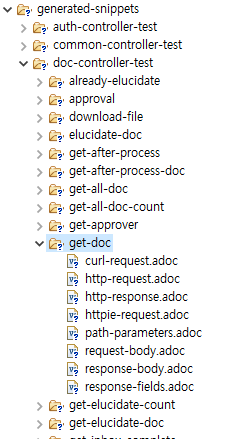
5. 문서화
이제 api-guide-doc.adoc ({project}/src/main/asciidoc/api-giuld-doc) 파일에
위에서 생성된 get-doc 의 http-request.adoc ... response-fileds.adoc 파일들을 넣어주면 된다.
== 문서

=== 조회

===== http request
include::{snippets}/doc-controller-test/get-doc/http-request.adoc[]
===== path parameters
include::{snippets}/doc-controller-test/get-doc/path-parameters.adoc[]
===== response fields
include::{snippets}/doc-controller-test/get-doc/response-fields.adoc[]
===== response
include::{snippets}/doc-controller-test/get-doc/http-response.adoc[]
이제 maven build (goals - package) 해 보면 target/generated-docs/api-guilde.html 파일이 생성된다.
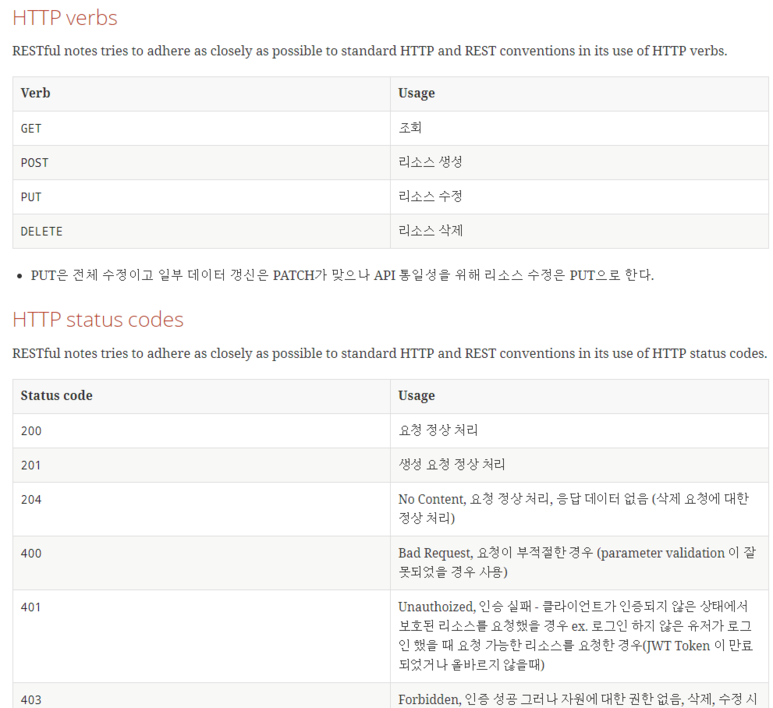
api-guilde.adoc 파일의 상단에는 [[overview]], 공통사항, header, header verbs, http status code 에 대한 설명을 넣어주면 더 좋다.
Test 한 코드에 대한 문서가 잘 생성된 것을 확인할 수 있다.

6. 문서의 커스텀
위에서 언급했던 optional()을 이용한 필수여부 포함처럼 필요한 정보들을 snippet에 추가할 수 있다.
src/main/test/resources/org/springframework/restdocs/templates 폴더에 (없으면 생성)
커스텀할 snippet template 들을 생성하면 된다.
아래 링크에서 default snippet 을 보고 copy 한 후 custom 하면 된다.

request-fields.snippets 의 예제는 아래와 같다. (mustache 문법을 이용한다.)
|===
|Name|Type|Required|Description

{{#fields}}
|{{#tableCellContent}}`+{{path}}+`{{/tableCellContent}}
|{{#tableCellContent}}`+{{type}}+`{{/tableCellContent}}
|{{#tableCellContent}}{{^optional}}true{{/optional}}{{/tableCellContent}}
|{{#tableCellContent}}{{description}}{{/tableCellContent}}

{{/fields}}

|===
이제 API가 추가되거나 수정될 경우 Junit을 통해 Test 를 하고 maven package 하면 바로 문서가 생성되며
코드와 문서의 일치가 유지된다.
'IT > Spring' 카테고리의 다른 글
| Spring Boot - using external yaml file (spring.config.import) (0) | 2021.03.02 |
|---|---|
| Spring Boot SSL 설정 팁 (alias 문제, jasypt를 이용한 암호화) (2) | 2020.06.15 |
| MockMvc 에 Spring Security Filter Chain 적용 (0) | 2020.03.26 |
| Spring Boot HTTPS 설정 & WebClient HTTPS (0) | 2020.02.20 |
| AOP - 필요할 때 마다 알아서 해 줄테니 넌 핵심 로직에 집중해 (0) | 2020.01.31 |

